
12V is connected to the RTMU86 com terminal input, and NO is connected to the positive pole of the electromagnetic lock power supply. After mu86 receives the unlock command, the com and no ports are turned on, and the electromagnetic lock is energized and unlocked.
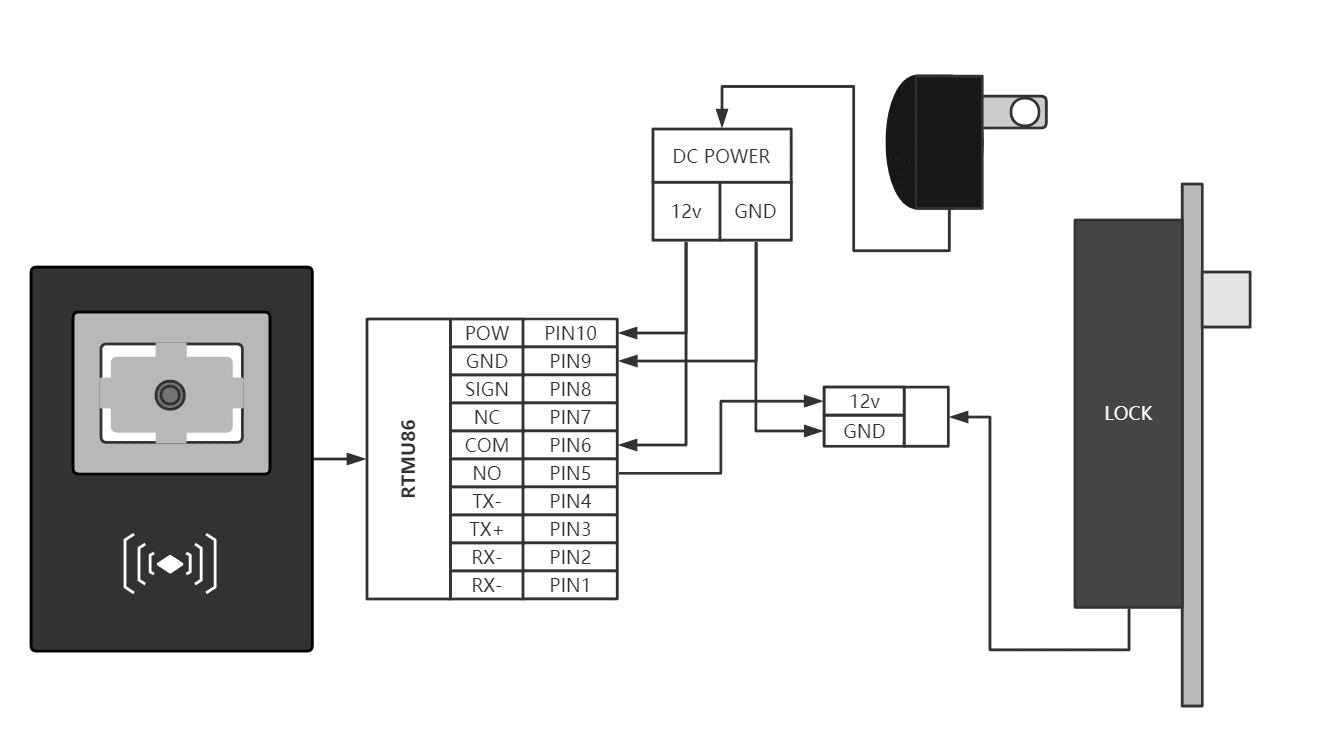
Door lock connection diagram
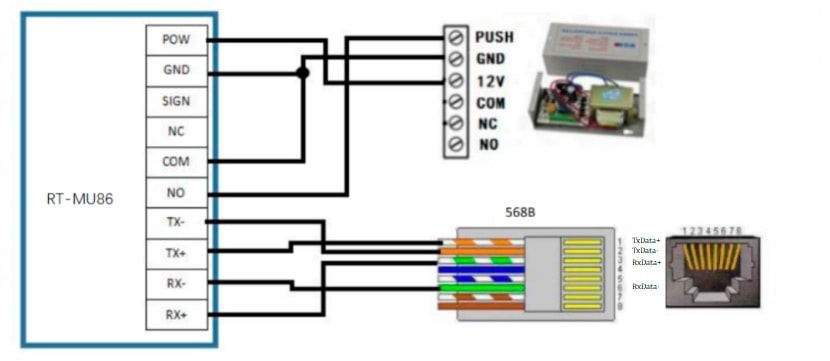
The RTMU86 Ethernet version (the other version is the Wiegand version) directly leads out four network cable pins, which can be connected to four of the standard eight-core network cables according to the color. The network cable adopts the 568B connection method. Please refer to the table for wiring according to the color.
| RTMU86 pins | Pin4 | Pin3 | Pin2 | Pin1 |
| Network cable color | Orange | Orange white | Green | Green white |
| Network cable color icon |
(1).Select RTMU86
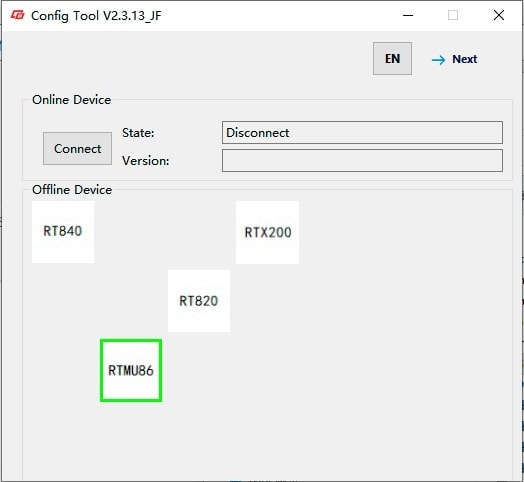
Click next
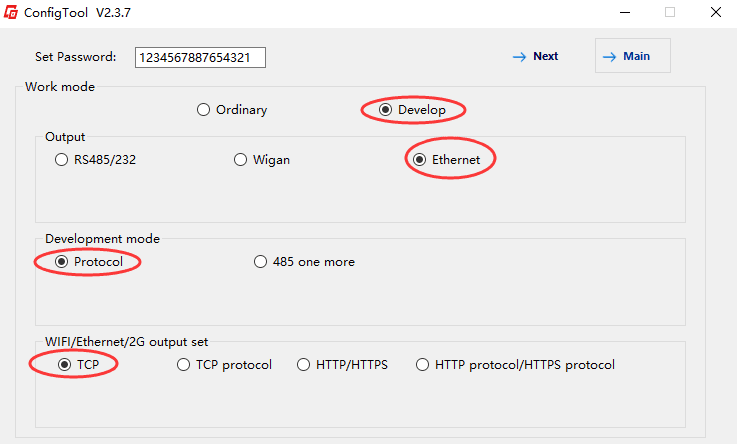
(2)Setup work mode
work mode:Develop,
Output: Ethernet
Development:Protocol
WIFI/Ethernet/2G output: TCP
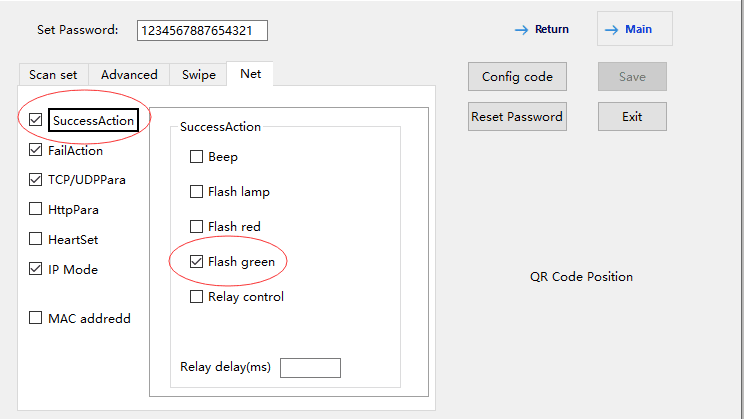
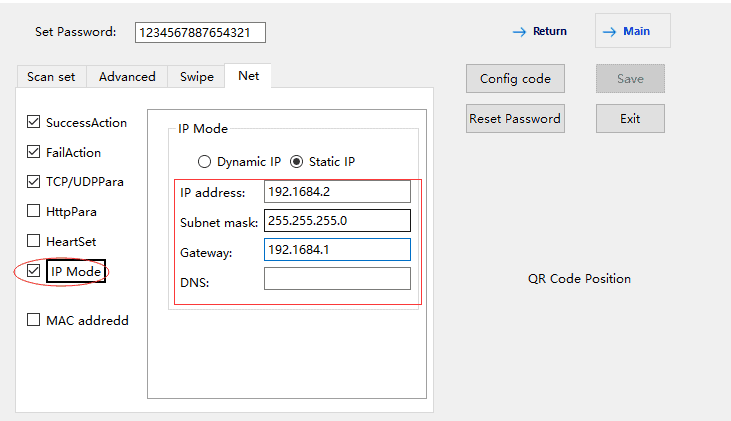
(3) Set NET
SuccessAction:flash Green (Optional)
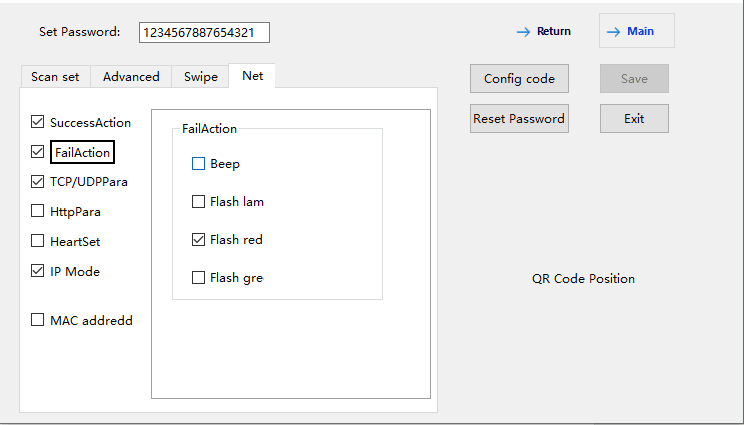
FailAction:flash red(Optional)
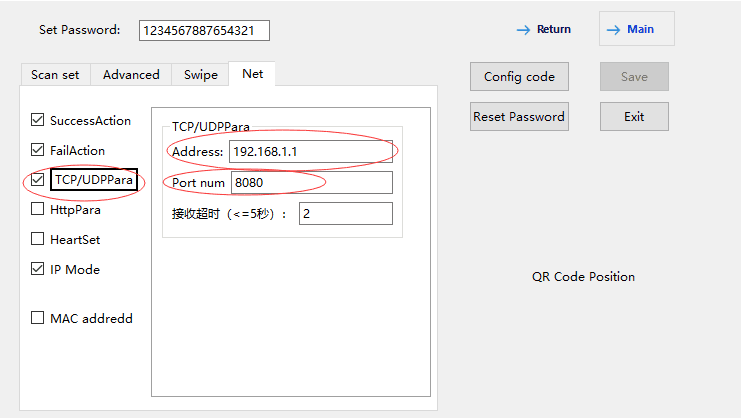
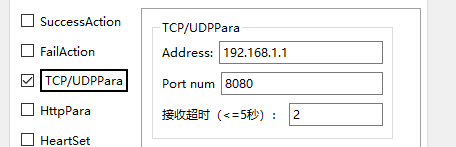
Set the service address and port to which the data is uploaded (*necessary settings)
Address: server address, such as 192.168.4.1
Port num: server port
IP mode setting
Dynamic IP: dynamic IP, IP address is automatically assigned by the router
Static IP: manually specify the IP address, when set to static IP, you must specify the IP address, Subnet mask, Gateway, the format is as follows
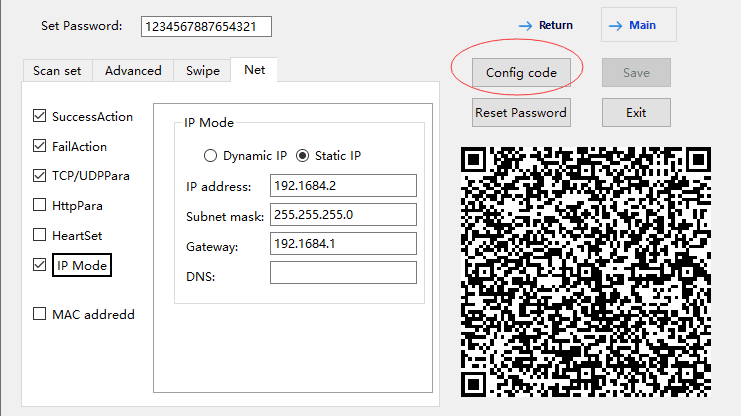
(4) Device scan code configuration
Click config code to generate configuration code. Device scan code configuration code to complete the configuration
For detailed usage of the configuration tool, please refer to “ScannerConfig Configuration Tool User Manual”.
After the configuration is complete, the device automatically connects to the specified server, and then reports the scan data after scanning the code.
As a client, the MU86 scanner can establish a long TCP connection to the server and process the response returned by the server. The interface specification is defined as follows
TCP/TCP protocol

The format of the requested TCP/IP server IP address is: xxx.xxx.xxx.xxx
The format of the requested TCP/IP server port is: 0-65535
The scanner sends the original scanned data to the server
server:
Use the server to build TCP server, accept the data reported by the scanner, determine the uploaded data, and issue the unlock command
Relay control command: (command is a hexadecimal array)
| Command header | Command word | Data length | Byte 1 | Byte 2 | Check word |
| 2Byte | 1Byte | 2Byte | 1Byte | 1Byte | 1Byte |
| 0X55 0XAA | 0x2a | 0X02 0X00 | 0x01 On 0x00 Off | Duration (unit: 50MS) 0x00: Default time |
E.g:
55 aa 2a 02 00 01 02 d4 Relay on 100ms
55 aa 2a 02 00 00 02 d5 off relay
More instructions reference<>
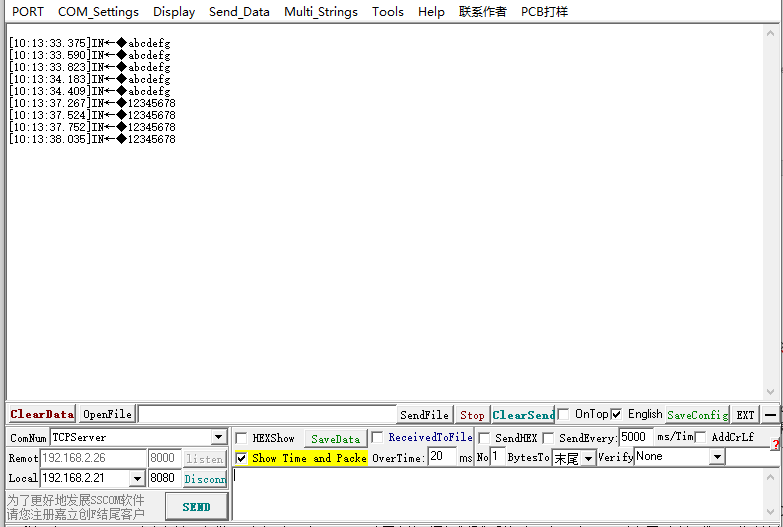
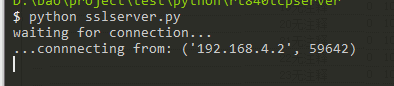
In this test, the server side uses python to build tcpsever, reads the data uploaded by the device, and judges whether it meets the registered id and is in compliance with the issued unlock instruction
Run py

The device establishes a connection
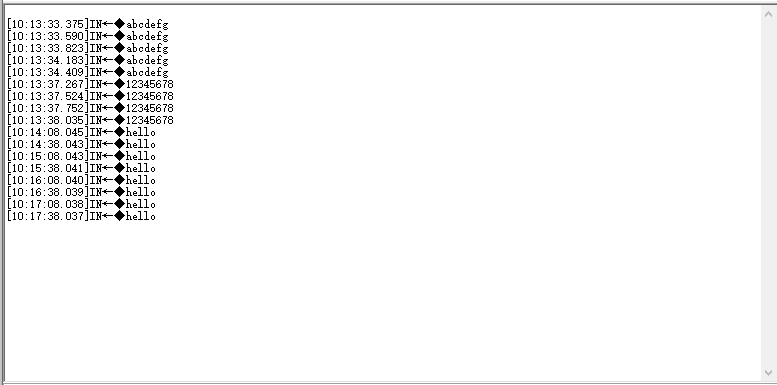
Uploaded data received
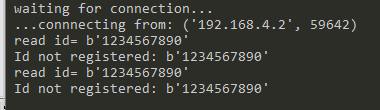
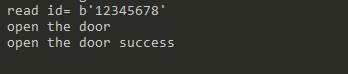
ID is the same as the saved id, issue the unlock command
Reference source code
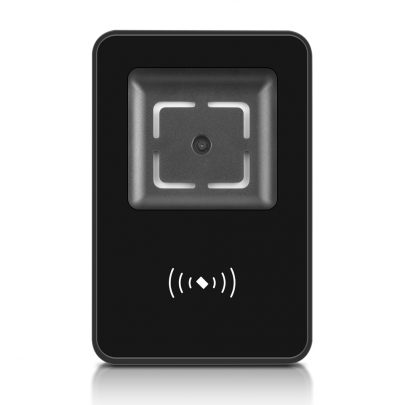
Related Products:

For any questions, please consult our sales engineer sales@rtscan.net or support team support@rtscan.net.
Thanks!